Sending an Email
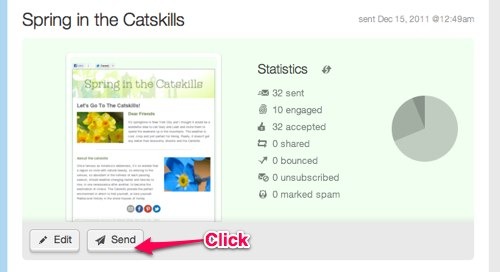
First, find your campaign in the Dashboard. Then click the Send button underneath the thumbnail.

If you're sending directly from composing, just click the Continue button in the bottom right corner of the composer page.
GoDaddy Email Marketing guides you through the next few steps. Don’t worry! Your campaign will not send until you confirm everything on the final step.
Now, follow along with the sending steps!
Recipients Tab of Sending Process
This is the page where you choose who to send the email to.
- If you want to send a test to just yourself, or a few folks who aren't collected in a list, just type them into the field called Send to individuals. Though it's perfectly fine to leave this field blank, if you're selecting Subscriber lists, below.
- Click the Include button next to any list you want to send your email to. Click the Exclude button next to any list who you want to make sure the email does not send to. Read more about excluding lists, here.
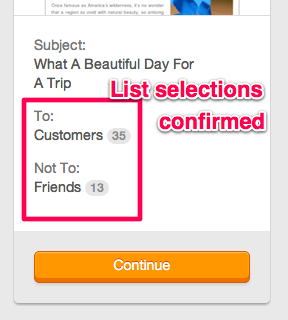
- GoDaddy Email Marketing confirms your list selections on the right side of the page. If everything looks good, hit Continue.
NOTE: Anyone added to the

Details Tab of Sending Process
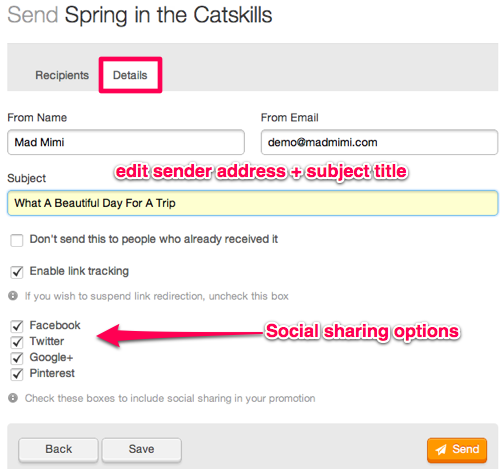
This is the page where you specify your sender display details, your subject line, and social sharing options.
- Check your From Name and From Email. These will default to your account settings, the first time you send. And for any subsequent sends, it will default to the last name and email used. But you can edit these here, each time you send.
- Next is your email Subject. This will default to the Campaign Title, the first time you send a mailing for any campaign. But if the campaign has been sent before, the subject line will default to the subject line previously sent. Just edit it here, to whatever you want it to be. Read more about the difference between Subject and Campaign Title, here.
- You can choose the option to Don't send this to people who already received it. Read more about this option, here.
- The Enable link tracking option is next. This allows GoDaddy Email Marketing to temporarily redirect all links through our servers, so we can report back to you exactly what happened with your emails. Usually you don't want to turn this off, since you won't receive any statistics reporting if link tracking is disabled. Read more about mailing statistics, here.
- Select the Social Sharing options that you want to include at the top of your email. These buttons allows your readers to like, tweet, pin, and +1 your campaign, on their own social networks. These are different than the Social Links to your own profiles that you can include in the footer of your emails.
- Click the Send button when everything looks good. But don't worry! Your campaign will still not send yet -- you have another chance to confirm all the details, in one place.
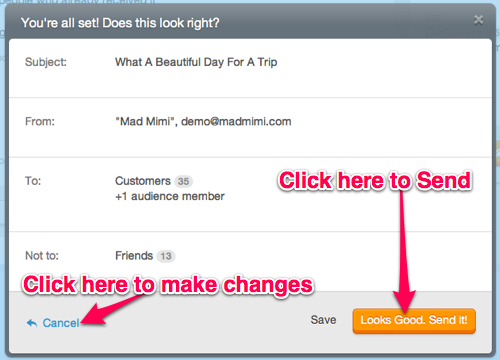
- Here’s your final chance to look everything over. All your recipient and mailing details are displayed for you, together, in one overlay screen. Give your details one last look, to make sure everything looks great! Then click Looks good. Send it! to get your mailing on its way.


NOTE: If you need to make any changes to these details, don't panic! Just click the Cancel link in the bottom left corner of the confirmation screen. You'll be returned to your Details tab, and can make any changes you need to.
If this is your first-ever time sending, you may need to go through our quick verification step. In that case, you'll get a message that your email is awaiting verification, and you'll be notified when it sends. This process usually only takes a few minutes, but keep an eye on your account email address inbox for news!
Related Topics:
Where Do I See Mailing Stats?
Can I Schedule An Email Newsletter To Send later?
Where Can I View My Old Campaigns?