Connect Your Facebook and Twitter Page Themes
With a Website Builder Business Plus plan, you can synchronize your website to your Twitter® and Facebook® account and we will automatically update the design of your social pages to match your website.
Internal Only Content
Note: This feature also is enabled for all Website Builder plans within 3-letter accounts.
If you have an existing Twitter and Facebook account, you can easily connect them to your Website Builder v7 site. Your Website Builder site will then automatically update your Twitter/Facebook themes to match your website.
If you don't have an existing Twitter or Facebook account, you can create a new account within Website Builder v7 designer.
To Sync your Facebook Pages with Website Builder
- Log in to your Website Builder account.
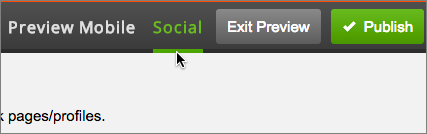
- Click Preview and click the Social tab.
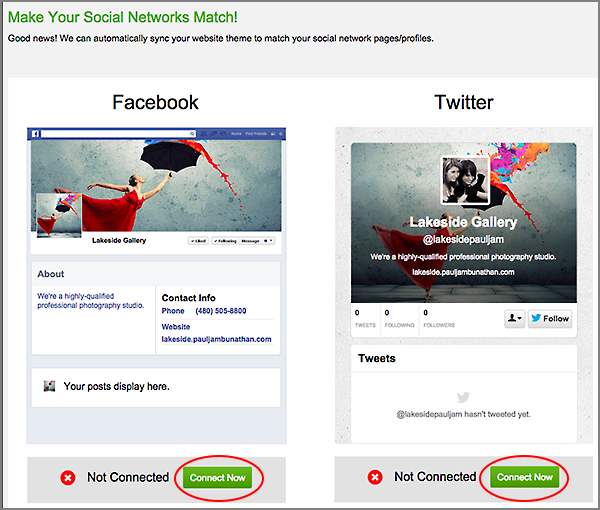
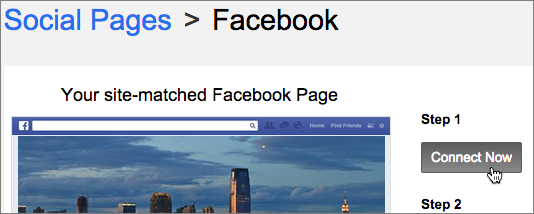
- Click Connect Now under the Facebook or Twitter page.
- Depending on whether or not you already have a Facebook or Twitter account, choose your next step:
If you have a Facebook account
If you have an existing Facebook account that you'd like to sync with your Website Builder site, follow these steps. Otherwise, see the next section: If you don't have a Facebook account.
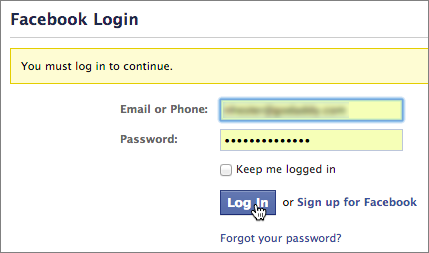
- Enter your login information.
- Select the Business Facebook page you want to sync with your website. Or click Create Facebook Page to do that. (During the process, Facebook will ask your permission to allow Website Builder to post to your Facebook site.)
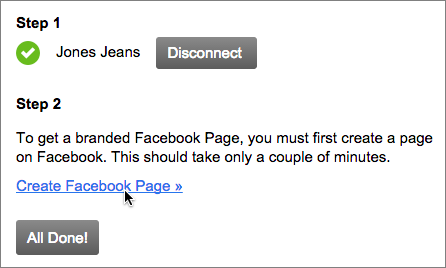
- Once you've selected the page, click Finished.
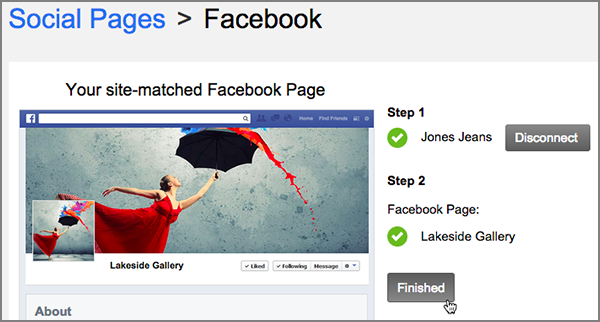
- To change your profile or cover photo, show or hide contact information or edit Facebook's short description of your business, click Make tweaks first. After making the changes click Save.
If you don't have a Facebook account
- Go to www.facebook.com, fill out the fields with your login and display information, and then click Sign Up.
NOTE: You must use a working email address to set up your Facebook account.
- Log into your email account and open the Facebook Account Confirmation email. (Check your Junk or Spam folder if it isn't in your Inbox.)
- Click on the link in the email to complete the setup process.
- After you've activated the account, you will receive one more email from Facebook to complete the sign-up process. In the email, click Confirm Your Account.
- Return to your Website Builder account, select Social Branding under the three-bar icon (Manage Settings).
- Beneath the preview of your Facebook page, click Connect Now.
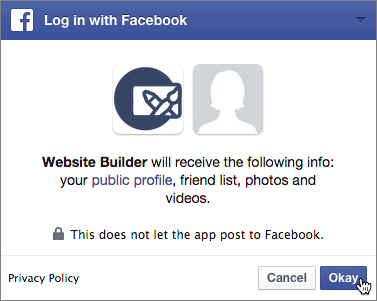
- In Website Builder's Social Pages window, click Connect Now under Step 1.
- Click Okay to confirm Website Builder's access to Facebook.
- In Website Builder's Social Pages window, under Step 2 click Create Facebook page.
- Select the page type that best represents your business or website, fill out the required information, and then click Get Started.
- Fill out the page details to give visitors more information about your Facebook page and website.
- After you've set up your Facebook page, return to Website Builder's Social Pages window, click All Done, and then Finished.
Now that you've created a Facebook account, you must set up a Facebook page for your website:
If you have a Twitter account
If you have an existing Twitter account that you'd like to sync with your Website Builder site, follow these steps. Otherwise, see the next section: If you don't have a Twitter account.
- In Website Builder's Social Pages window, click I already have one.
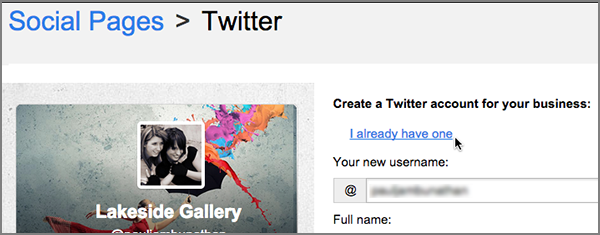
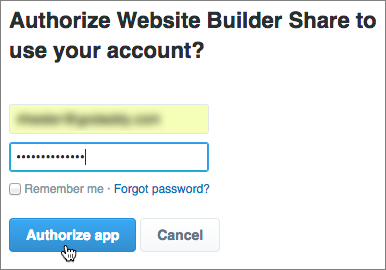
- When Twitter asks if it's OK for Website Builder to share your account, enter your login information and click Authorize app.
If you don't have a Twitter account
If you don't have an existing Twitter account and would like to create one:
- Click Create Account.
- Enter a Twitter name in the Username field. (We recommend a Twitter name based on your website name.)
- In the Full Name field, enter your full name or your company name.
- In the Email address field, enter your contact email address.
- In the Password field, enter a password for your Twitter account.
- Select the checkbox to agree to the Twitter Terms of Service and Privacy policy, and then click Sign Up.
- Enter your login information.
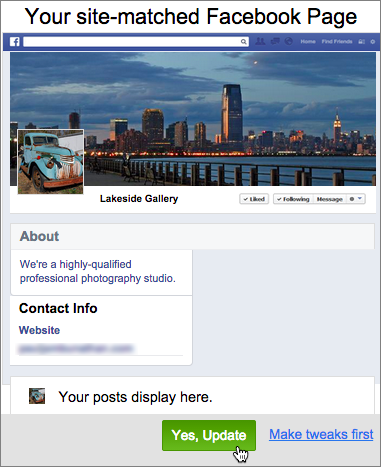
- In Website Builder's Social Pages window, click Yes Update to save your Facebook or Twitter page theme, or click Make tweaks first to make changes to the page designs.

NOTE: You can return and make updates to the page design at any time.
- Click OK when the confirmation window displays, then click Publish.
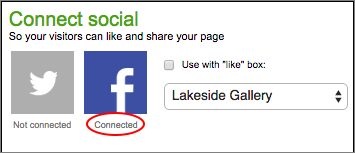
- Switch to your Facebook or Twitter account to see how Website Builder has updated their themes.
NOTE: Updating your Facebook or Twitter page only updates the design of the page to match your Website Builder site. Your posts and followers are not affected.
NOTE: It might take a few minutes for your Facebook or Twitter page to become available after you publish.
Disconnecting Website Builder v7 from Facebook or Twitter
There may be times when you'll want to turn off the connection between Website Builder and Facebook or Tweeter — at least temporarily. For example, if you're making a lot of changes to your site in a short period, you may want to turn off the sync until you're done. And, of course, it's easy to reconnect your site by following the steps in "Connecting to Facebook or Twitter."
To disconnect Facebook from Website Builder v7
- Log in to your Website Builder account.
- Click Edit Site.
- Click Preview and click the Social tab.
- At the bottom of the Facebook page preview, click Disconnect.

- When the confirmation window displays, click OK. The connection will be removed.

NOTE: Facebook may still show as "Connected" in the Site Settings, even when the two are disconnected.
To disconnect Twitter from Website Builder v7
- Log in to your Website Builder account.
- Click Edit Site.
- Click Preview and click the Social tab.
- At the bottom of the Twitter page preview, click Disconnect.
- When the confirmation window displays, click OK. The connection will be removed.
NOTE: Twitter may still show as "Connected" in the Site Settings, even when the two are disconnected.
Next Step
- For a linked list of Website Builder's other major tasks, see Using Website Builder.